

Hello fellow programmer padawans
As you can understand from the title I will tell you how to create a web, Android, and IOS project with React Native and Expo. First, we need the Expo CLI package.
What’s Expo CLI?
Expo CLI is the npm package that creates a project that we can test on our devices. We won’t need to write codes on Xcode or Android Studio. We only need Visual Studio Code and we can write codes for 3 different environments.
First things first, we need NodeJs installed on our computer if you don’t have it you can download it here: https://nodejs.org/en/.
Install Expo and Create Project
To install the Expo CLI you need to open Node.js Command Prompt and run this code
npm install -g expo-cli
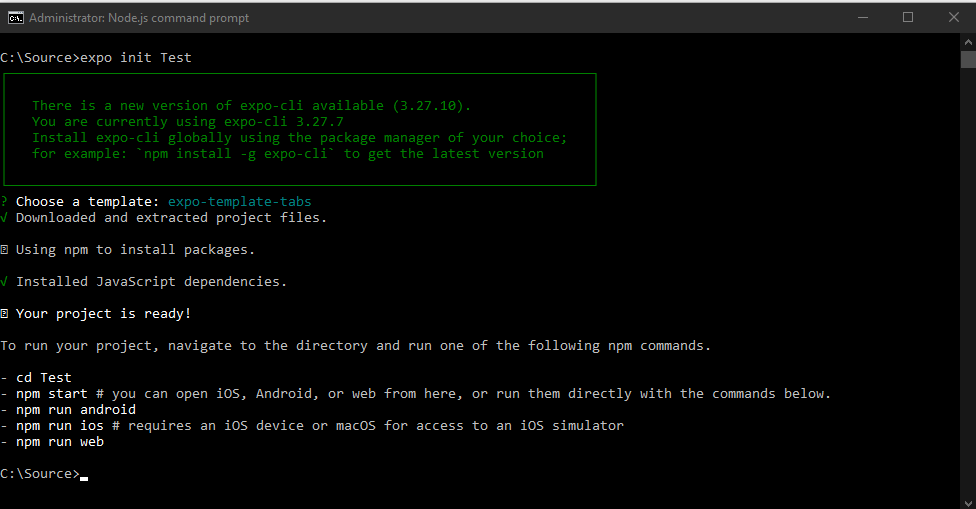
To create the project run this code below
expo init ProjectName
Template Selection
As soon as you make the code creation command run, you will see the selection menu as shown below. We need to select a template depending on our needs. I prefer to select a TABS template, it’s a TypeScript and a very good sample to learn and to see the structure of the project.

Start your project and see your app on your device
After the project creation is over we need to go inside the project folder from Nodejs Command Prompt to start your project.
expo start
Then we can see a website and a barcode on the command prompt, that barcode is the magic. I will show you…

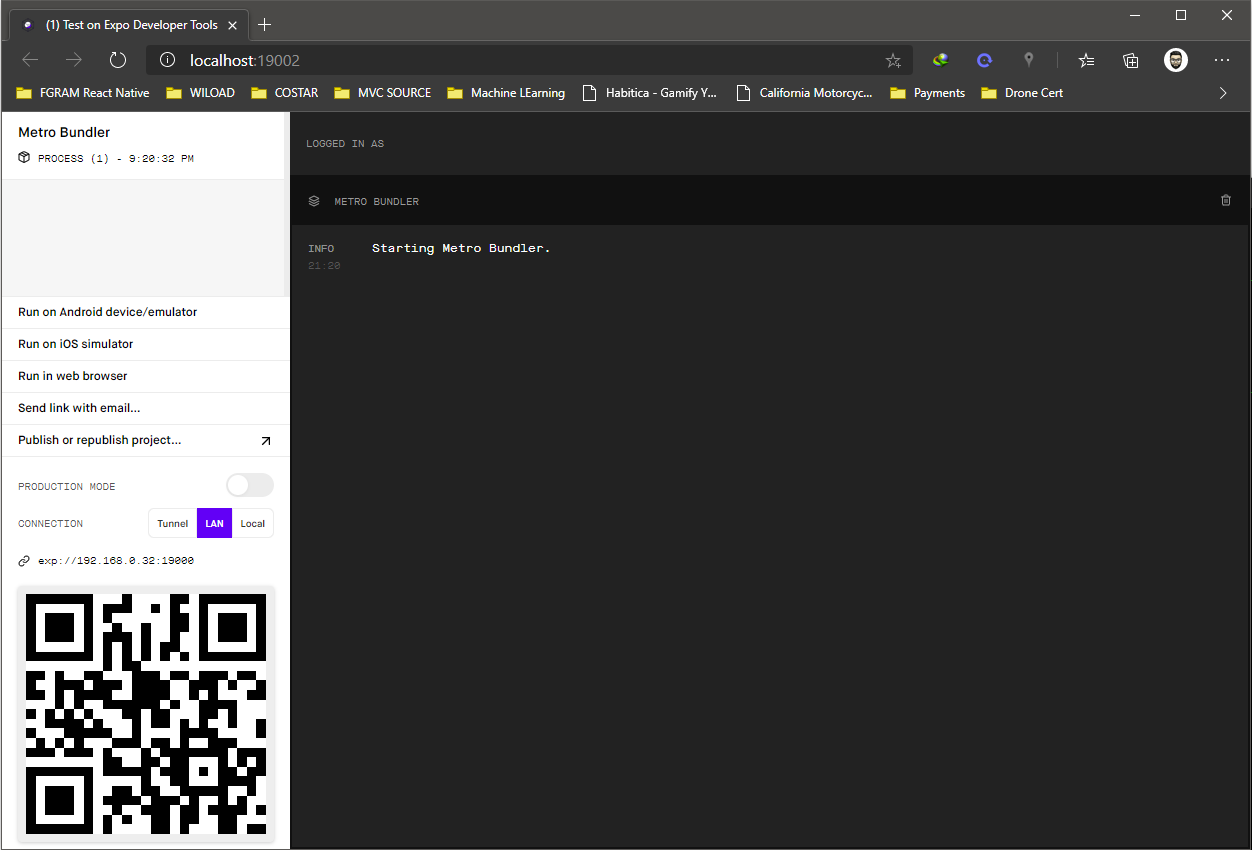
After you see all these screens you now are ready to test your app on your device. Download the Expo app from the Apple App Store or Google Play and create an account.
Open your Camera and read the barcode. It will then ask you to open in the Expo app, do it and Voila! Your app is working on your phone or tablet.
First, open the project folder with Visual Studio Code so you can checkout the folder and file structure. Then you can find the Screens folder and make some changes on the TabScreenOne.tsx or TabScreenTwo.tsx files and you will see your app is changing on your device as well.

That’s all for now! I will write about components on React Native on my next post.
Thanks for reading
May the force be with you.
Hi there! I could have sworn I’ve visited your blog before
but after browsing through a few of the articles I realized it’s
new to me. Anyways, I’m definitely happy I stumbled upon it and I’ll be bookmarking
it and checking back regularly!